Apple Developer Program
 Organizations such as school districts must have their own Apple Developer Program Membership in order to get their apps published in the public App Store.
As per Apple’s App Review Guidelines, apps should be submitted by the provider of the app’s content. If the app content and the app developer do not match, Apple will likely refuse to publish the app.
Appazur will support you through this process. With your own Apple Developer Program Membership, your app will be listed with your school district as the “Seller”, which is great for assuring parents and students that they are downloading the correct software.
Organizations such as school districts must have their own Apple Developer Program Membership in order to get their apps published in the public App Store.
As per Apple’s App Review Guidelines, apps should be submitted by the provider of the app’s content. If the app content and the app developer do not match, Apple will likely refuse to publish the app.
Appazur will support you through this process. With your own Apple Developer Program Membership, your app will be listed with your school district as the “Seller”, which is great for assuring parents and students that they are downloading the correct software.
You need only one membership per school district or association, regardless of the number of school apps.
As of February 2022, you may now opt out of listing your app in the public App Store, with the Unlisted App option.
Cost
For a customized/branded app, you’ll need an Apple Developer Program membership. Apple’s annual fee is waived for non-profit organizations and accredited educational institutions (including schools and school districts) in the USA, Canada, and some other countries.
🇨🇦 If you have been paying the $119 annual fee for your Canadian school district, you may now apply for a fee waiver.
To join the Apple Developer Program at no cost as an eligible school, school district, or organization, select the option to request a fee waiver when completing enrollment. If the fee waiver is approved, your organization will not need to pay for membership when completing your enrollment.
Prerequisites
Apple ID and an Apple Device
First of all, choose or create an Apple ID (e.g. your iPhone/iCloud account). You can use any Apple ID for this process, as you can add and remove users associated with the Developer Program Membership at any time in the future. You can create a new Apple ID here:
https://appleid.apple.com/account
Because Apple now requires that you set up 2 Factor Authentication (“2FA”) to secure your Apple ID, you’ll have to have an Apple device (iPhone, iPad, iPod Touch, or Mac) associated with the Apple ID, or if you do not have access to an Apple device, you can set up 2FA using a phone number. Regardless, when you’re setting up 2FA for the first time, you’ll also need to specify a “trusted phone number”. That is a number that can be used to receive verification codes by text message or automated phone call. Help with setting up 2FA can be found here:
https://support.apple.com/en-us/HT204915
It is not easy to share an Apple ID between users, unless you have a shared Apple device or mobile phone number to go with it, because two factor authentication (2FA) makes that a challenge. The easiest thing is to use a personal Apple ID to access your school district Apple Developer Program. If you do not have access to an Apple device, you can set up 2FA using a phone number.
D-U-N-S® Number
You may not be familiar with “D-U-N-S numbers”, but your school district (and each of your school locations) almost certainly has one already. Whoever handles your purchasing should be able to tell you your number. It’s normally used for credit checks, but Apple just uses it as a shortcut to know you are a real organization. If you don’t have a D-U-N-S number, you can get one for free. It’s easy to find out your D-U-N-S number here:
Be sure to enter the name and address of your main district office. You can request that your D-U-N-S number be emailed to you.
Signing Authority
As the person enrolling your organization in the Apple Developer Program, you must have the authority to bind your organization to legal agreements.
Enrolling in the Apple Developer Program

-
Browse to:
and click Start your Enrollment. Sign in using your Apple ID as discussed above.
-
You’ll be prompted to “Confirm your personal information”. Enter your full legal first and last name. Then, enter your work address and phone number.
-
Confirm that all your information is correct (email, name, location), and choose Accredited Education Institution, if applicable, for Entity Type.

-
You may be prompted for your website and phone number. Enter your work phone number.
-
You may be prompted to “provide a reference who can verify your signature authority.” They may contact this person to confirm that you can accept the Apple Developer Program License Agreement on behalf of the organization, so be sure to let them know to expect this.
-
Read the Apple Developer Program License Agreement, check the box confirming you have read the agreement and click Continue.
-
Confirm that all the previously entered information is correct and click Continue.
-
Be sure to select the option to request a fee waiver, if the organization is a non-profit educational institution. If the option is available, it’s important to select Automatic Renewal so that your membership will be automatically renewed (otherwise, your app may be de-listed from the app store next year if you forget to renew). Then, click Purchase to submit your membership application.
-
If prompted, sign in with your Apple ID and fill in your billing information. Then click Continue to complete the setup of your membership.
-
You’ll see a confirmation screen, and you should make a note of the Enrollment ID. Then, please allow 1 to 7 days to hear from Apple.
Grant Access to Appazur
Finally, when your Apple Developer membership is approved, you’ll need to grant access to allow Appazur to publish your app(s).
-
Click the “+” to add a new user.
-
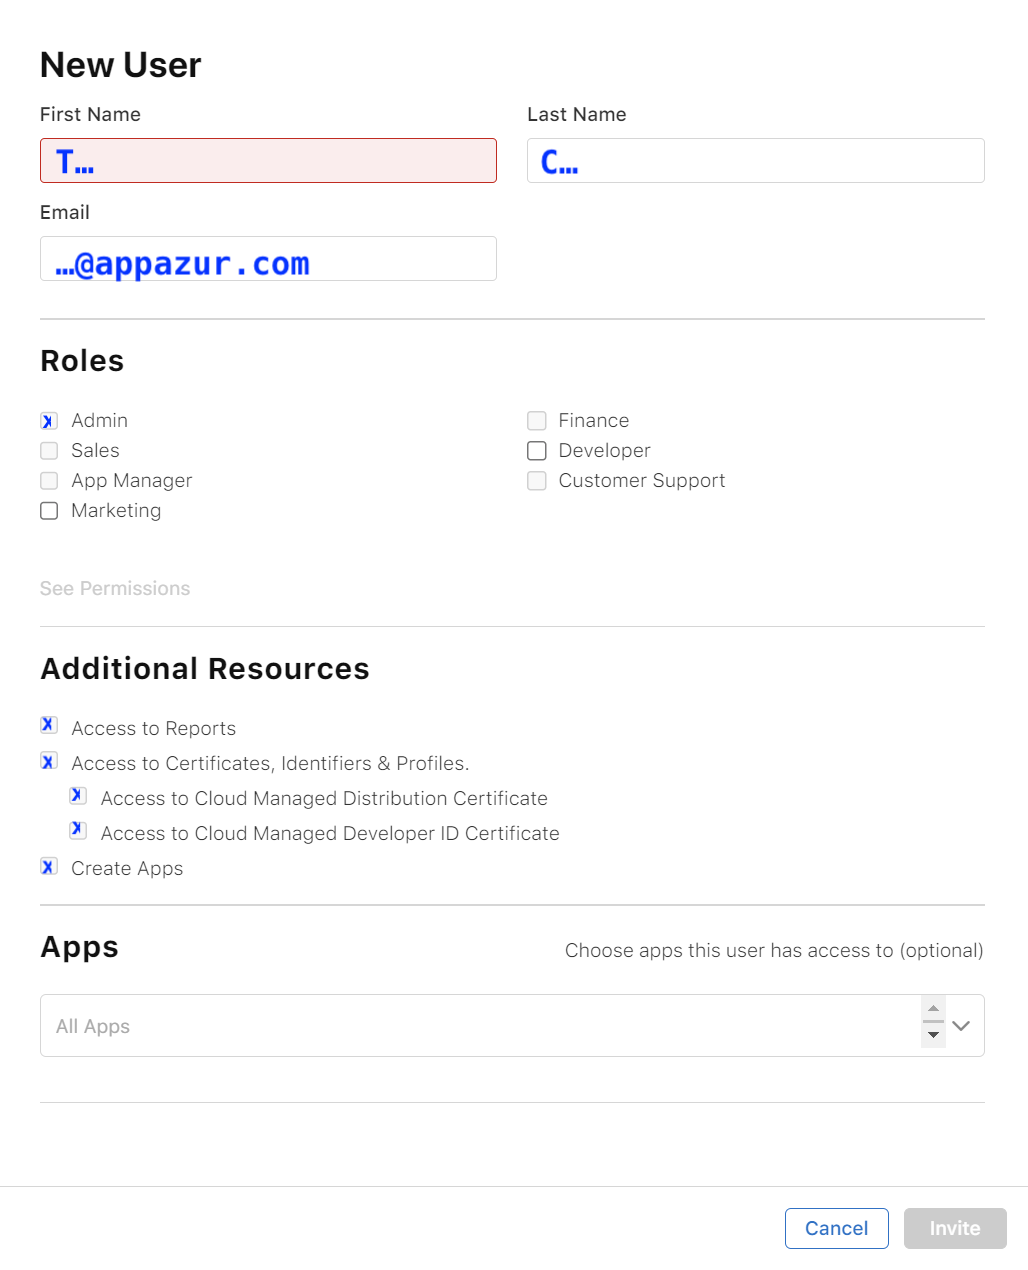
Enter First Name, Last Name and Email for Appazur’s Apple ID (Appazur will provide you with this information).
-
Under Roles, select Admin. (If you prefer, you may grant App Manager and Customer Support roles. However, in that case you’ll have to follow our instructions to complete Apple’s privacy questionnaire.)
-
Under Additional Resources, check all checkboxes.
-
The Apps section may be left blank (“All Apps”). If you have any non-Appazur apps, you can restrict Appazur’s access to specific apps here.
-
Click Invite.
Add Additional Administrators
You can have more than one Apple ID associated with the program. Unfortunately only one can have the critical “Account Holder” role, but it is good practice to add at least one other user from your organization and grant them the Administrator role.
Control Your Email Notifications
- You are only responsible for subscription renewal and legal agreements. To avoid receiving many unneeded technical emails, we recommend that you clear the Notifications/App Status Reports field for your own account.