If you already have ChromeOS devices set up with the discontinued Appazur Kiosk app, skip ahead to Upgrade Existing Devices.

If you just want to quickly test out Appazur Digital Signage, contact Support for simplified instructions.
As described below, more steps are required to run as a secure “kiosk” and to have the displays come back up automatically after a power failure or reboot.
Use your organization’s Google Workspace Admin Console to prepare for deployment of new Managed ChromeBoxes with Appazur Digital Signage. Your devices will start showing the correct content as soon as they connect to the specified Ethernet or Wi-Fi network.
If your organization does not have Google Workspace, or you do not have access to your Google Admin Console, then this may not be a suitable procedure for you. Please check with Support.
ChromeOS version 81 or later is required.
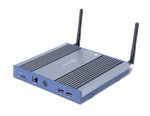
Appazur-ready ChromeOS media players can be purchased from major computer hardware suppliers that are likely already on your approved vendors list, including:
Note: We recommend high performance devices to support showing video along with other content.
You’ll also need:
In your Google Workspace Admin Console, go to Directory > Organizational units and create a "signage" Organization Unit (OU). You can call it something else, of course, but in this document we will refer to it as the "signage" OU.
If your organization is a school district you create an additional OU for each school under the “signage” OU. You only need to include the schools that will be using digital signage.
If necessary, at the top, click Filter to open your organization tree on the left. Hover over the organization you want to place your organization under. Then, click More and then Add sub organization.
https://admin.google.com/ac/orgunits
Your Organization Name
    signage
        Building 1
        Building 2
        Building 3
        ...
Configure the following in your Google Workspace Admin Console.
For all of the steps below, be sure you are working with the “signage” OU.
Devices > Chrome > Settings
Go to User & browser settings > Enrollment controls.
- Choose “Place Chrome Device in User Organization”.
Go to User & browser settings > Notifications.
- Choose “Allow sites to show desktop notifications”.
- Enter "*.appazur.com" under "Allow these sites to show notifications".

Devices > Chrome > Apps & extensions
On the right hand side, under Kiosk settings, select:
Save.
Devices > Chrome > Settings
(Note: You may not see this menu until you have at least one ChromeOS license)
Go to Device settings > Enrollment and access.
- Leave as "Force device to automatically re-enroll after wiping"
- Set "Disabled device return instructions".  This may be “Contact [email protected] for more information” or you may prefer your own support contact message.

Go to Device settings > Kiosk settings.
Go to Device settings > AC Kiosk power settings.
Go to Device settings > Power and shutdown.
Go to Device settings > Other settings.
Save.
This step is not needed if you will be enrolling devices yourself. When you enroll the devices with your own account you will need to use the Google Workspace Admin Console to move each device to the correct OU.
To streamline device setup simply create a new user under each school OU, for example “[email protected]”. This helps by having the device move to the correct OU upon enrollment. The disadvantage is you may need to configure your email system to forward this email to a suitable place.
Follow this procedure when hardware arrives.
These steps must be followed carefully, otherwise it can take more time to correct mistakes.
This step is applicable only for resellers and district IT departments:
When you are successful, Appazur Digital Signage should take over the full screen, with an activation code. You can then activate your media player as described here.
For more information, Google documents the procedure on this page:
https://support.google.com/chrome/a/answer/1360534?hl=en
*If you accidentally use the sign-in procedure instead of the enrollment procedure, recovery instructions are here (this takes about 15 minutes):
https://support.google.com/chrome/a/answer/1360642?hl=en
To upgrade, only the following Google Workspace Admin Console steps are required (copied from the full setup procedure above):
Go to Devices > Chrome > Settings > User & browser settings > Notifications.
- Choose “Allow sites to show desktop notifications”.
- Enter "*.appazur.com" under "Allow these sites to show notifications".
Go to Devices > Chrome > Apps & extensions
On the right hand side, under Kiosk settings, select:
Save.